欢迎来到C++ C++可以直接控制硬件
C++几乎可以运行在全平台
C++可以编译为在各种平台上的本地代码,而C#或者java是在虚拟机上运行的,这意味着你的代码被编译成一种中间语言,当你的程序在目标平台上运行时,虚拟机在程序运行时,再转换为机器码
如果你写的代码很垃圾,你的代码很可能没有虚拟机代码要快,但你真正需要性能的时候,你需要C++
善用谷歌
在Windows上安装C++ 你完全可以用文本编辑器编写C++代码,比如记事本,当你写完之后,你需要通过编译器来生成可执行的二进制文件来运行程序,所以,我们需要一个集成开发环境
在这个教程里我们使用Visual Studio
VS中的解决方案是一组关联的项目,可以是各种项目类型,每个项目本本质上就是一组文件,被编译成二进制文件
C++是如何工作的 C++工作的基本流程是:你有一些C++源文件,将这些源文件给到编译器,编译将其转换成二进制的东西,这个东西可能是某种库,或者是可执行的程序
C++源文件
预处理 编译器会先处理预处理语句,预处理语句在编译之前就被处理了
main函数 main是程序的入口,计算机从main开始逐行执行我们的代码,
main的返回值是int,main函数不写返回值也是被默许的,不写默认返回0
C语言main函数返回值详解-CSDN博客
编译 首先,编译器先处理预处理语句,在上面的例子中,编译器将iostream文件的内容全部包含进来,这样的”包含”可以理解为简单的复制粘贴
处理完所有的预处理语句之后,我们的程序被编译,转换为机器代码,其中有些重要的设置决定我们怎么转换代码
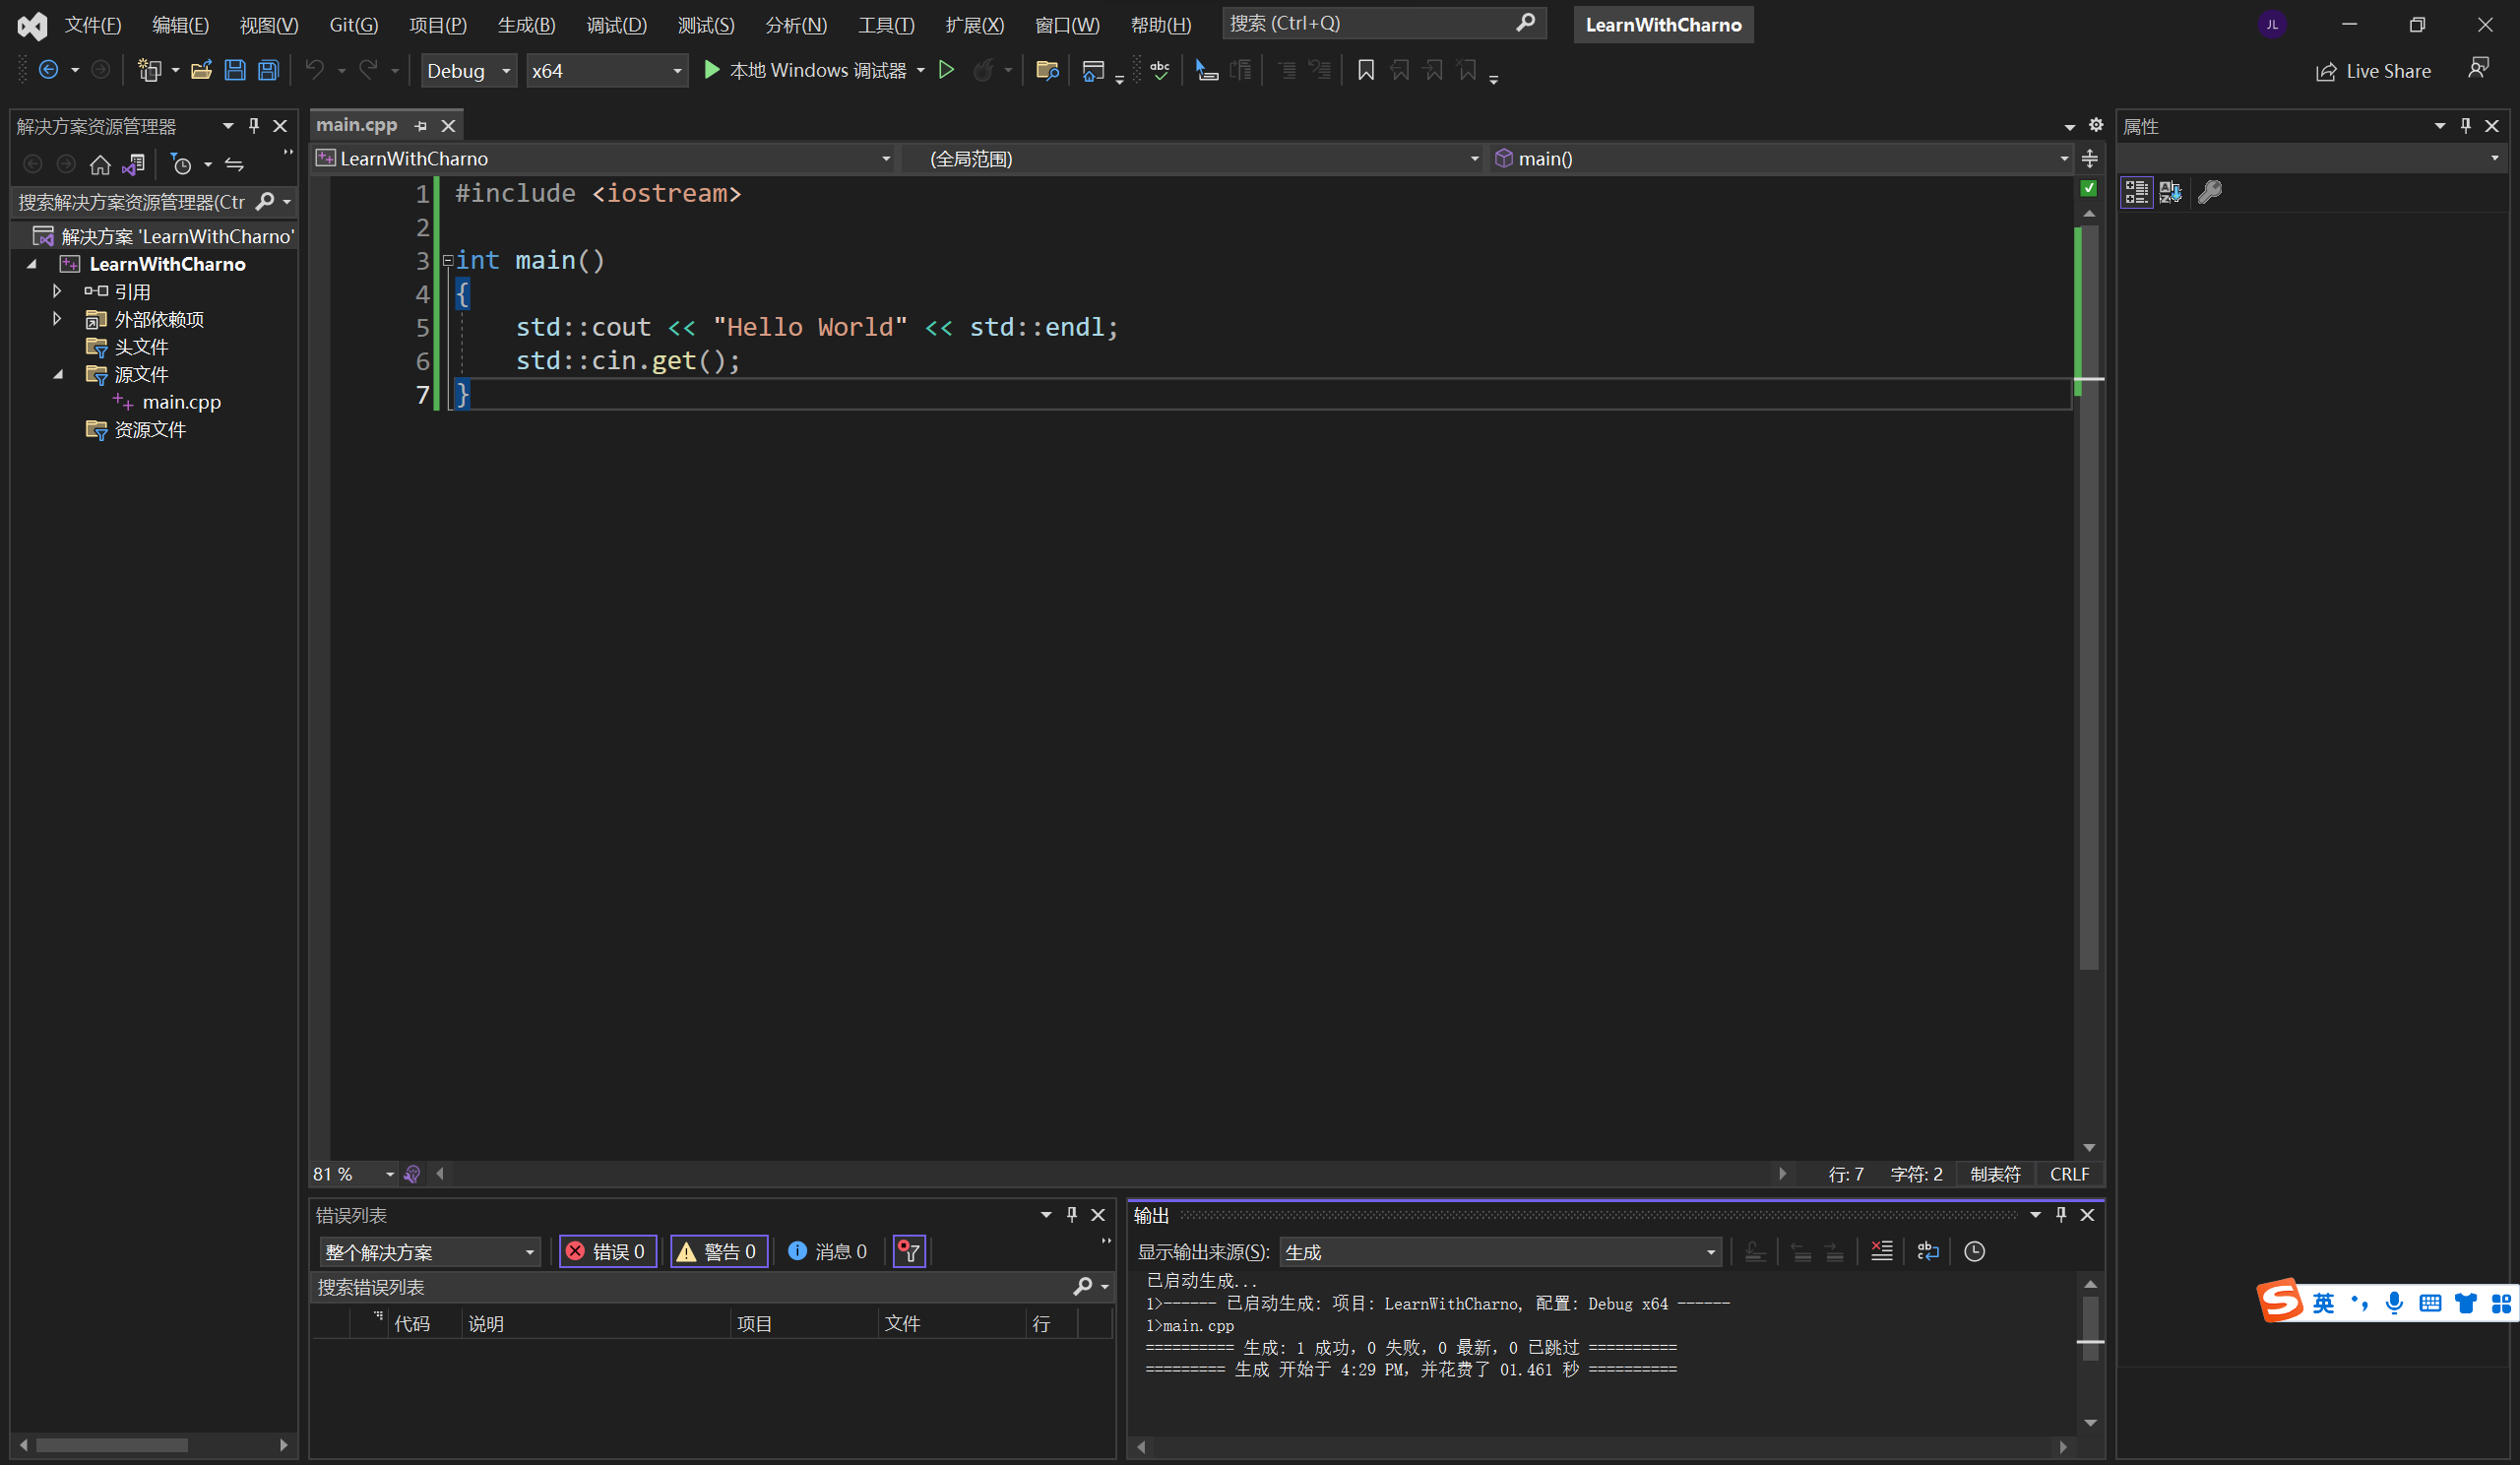
在VS中,界面上方有两个设置,解决方案配置和解决方案平台,默认是debug和x86,解决方案配置是构建项目时的一系列规则,解决方案平台是你编译代码的目标平台
项目属性界面可以更改一些重要设置,其中,Configuration type默认设置为application(.exe),意味着我们要编译可运行文件,你也可以更改为编译库文件
默认的debug比release更慢,因为debug配置把许多优化关掉了,以支持我们调试代码
继续说编译,每个cpp文件都被编译成了一个object file(目标文件),如果你用的是VS,生成的文件后缀是.obj
当我们得到了所有的obj文件,有需要将这些文件合并成一个执行文件,此时需要链接器
我们可以用Ctrl+F7单独编译一个文件,此时还没有链接,我们在文件管理器中打开项目,在Debug目录下会发现多出了main.obj,对于每个cpp源文件,编译器都会生成对应的obj文件
如果我们生成整个项目,在另一个Debug目录下会发现.exe文件,双击即可运行
链接 但如果是多文件,比如
1 2 3 4 5 6 7 8 #include <iostream> void Log (const char * message) int main () Log ("Hello World" ); std::cin.get (); }
1 2 3 4 5 6 7 #include <iostream> void Log (const char * message) std::cout << message << std::endl; }
在函数声明中你也可以不写参数名字
编译程序,因为main.cpp中有Log的声明,编译器会相信在其他的某个地方,比如这个文件下方或者其他文件中,会有Log函数的定义,声明就像一种约定
通过链接让声明的函数运行到正确的代码,如果在构建项目的时候找不到函数定义,就会出现链接错误,但如果仅仅编译文件,就不会出现,或者说还没有发现错误
C++编译器是如何工作的 C++编译器不关心”文件”,文件只是提供给编译器源代码的一种方式,文件后缀的意义在于让编译器知道如何处理文件,如果是.cpp文件,编译器就用处理源的方式处理,如果是.h文件,编译器就用处理头文件的方式处理
文件后缀在windows中的作用也大概如此
预处理 我们在上一篇的基础上在项目中加入一个文件
1 2 3 4 5 6 int Multiply (int a, int b) int res = a * b; return res; }
编译此文件
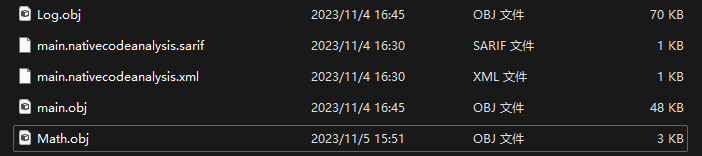
对比三个文件的目标文件
你会发现Log.obj和main.obj很大,但Math.obj很小,是因为前两者中包含了iostream
我说过,include的作用基本上是简单的复制粘贴,我们做一个测试
加入文件
修改Math.cpp
1 2 3 4 5 6 int Multiply (int a, int b) int res = a * b; return res; #include "EndBrace.h"
你会发现程序依然可以编译通过
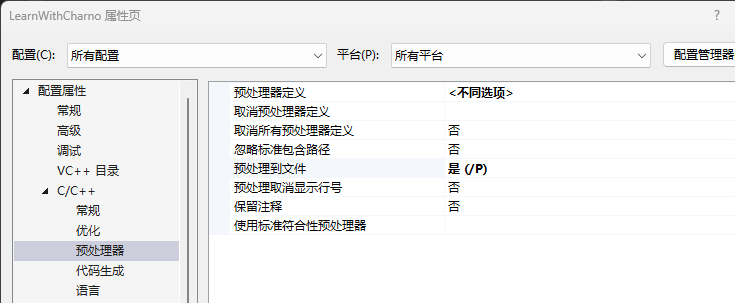
我们现在将”预处理到文件”打开
修改Math.cpp
1 2 3 4 5 6 7 8 9 10 11 12 #define INTEGER int #if true int Multiply (int a, int b) int res = a * b; return res; #include "EndBrace.h" #endif
编译后,你会发现项目文件夹中多了一个Math.i文件,.i后缀的文件是预编译处理后的文件
1 2 3 4 5 6 7 8 9 10 11 12 13 14 15 #line 1 "E:\\VS2022program\\LearnWithCheron\\LearnWithCheron\\Math.cpp" int Multiply(int a, int b) { int res = a * b; return res; #line 1 "E:\\VS2022program\\LearnWithCheron\\LearnWithCheron\\EndBrace.h" } #line 10 "E:\\VS2022program\\LearnWithCheron\\LearnWithCheron\\Math.cpp" #line 12 "E:\\VS2022program\\LearnWithCheron\\LearnWithCheron\\Math.cpp"
继续修改Math.cpp,编译
1 2 3 4 5 6 7 8 9 10 11 #define INTEGER int #include <iostream> #if true int Multiply (int a, int b) int res = a * b; return res; #include "EndBrace.h" #endif
你会发现我们得到了一个将近7万行的Math.i,最底部是我们自己的函数
编译 现在我们把”预处理到文件”关掉,不然编译器就不会生成.obj文件了
现在我们重新编译Math.cpp,然后查看它的目标文件
如果你用记事本打开.obj文件,你会发现它是二进制,或者是一堆乱码,总之是不可读的,我们现在用VS将其转换成可读的内容
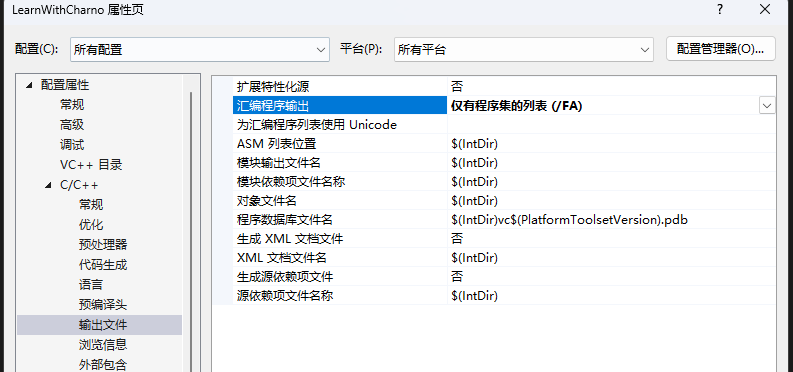
更改项目属性,编译
现在我们得到了一个Math.asm文件,打开
现在这个东西基本上是可读的了,你会发现一堆汇编指令,呈现了我们代码具体执行时的细节
比如int res = a * b对应的是
1 2 3 4 ; Line 6 mov eax, DWORD PTR a$[rbp] imul eax, DWORD PTR b$[rbp] mov DWORD PTR res$[rbp], eax
总之现在我们有了编译后的.obj文件,可以开始链接了
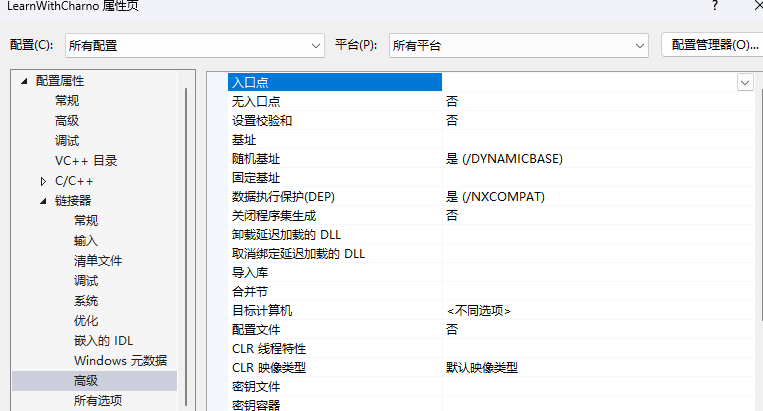
C++链接器是如何工作的 链接对于C++程序的运行是必要的,就算你将所有的代码写在一个文件里,应用程序依然需要知道入口在哪,也就是main函数在哪
在项目属性中,你可以找到一个设置可以更改程序的入口,这说明程序入口可以不是main函数,但通常而且默认是main函数
继续上一篇,现在将项目属性改为默认,修改Math.cpp
1 2 3 4 5 6 7 8 9 10 #include <iostream> void Log (const char * message) std::cout << message << std::endl; } int Multiply (int a, int b) int res = a * b; return res; }
Ctrl+F7,编译通过,右键项目点击”生成”,我们得到了一个链接错误
1>E:\VS2022program\LearnWithCheron\x64\Debug\LearnWithCharno.exe : fatal error LNK1169: 找到一个或多个多重定义的符号
这是因为void Log(const char*)在Log.cpp中也定义过一次
现在我们删除所有文件,只保留并修改Math.cpp,生成项目
1 2 3 4 5 6 7 8 9 10 11 12 13 14 #include <iostream> void Log (const char * message) int Multiply (int a, int b) Log ("Multiply" ); return a * b; } int main () std::cout << Multiply (5 , 8 ); std::cin.get (); }
此时会出现链接错误,原因是没有Log的定义
继续修改,生成项目
1 2 3 4 5 6 7 8 9 10 11 12 13 14 #include <iostream> void Log (const char * message) int Multiply (int a, int b) return a * b; } int main () std::cout << Multiply (5 , 8 ); std::cin.get (); }
链接错误消失了,很好理解,Log没有被调用,也就不需要链接了
但如果我们这样修改,再次生成项目
1 2 3 4 5 6 7 8 9 10 11 12 13 14 #include <iostream> void Log (const char * message) int Multiply (int a, int b) Log ("Multiply" ); return a * b; } int main () std::cin.get (); }
可以看到,虽然Multiply没有被调用,但Log被Multiply调用了,依然会出现链接错误
这是因为,虽然在这个脚本里我们没有使用Multiply,但在其他的脚本里我们有可以会使用Multiply,所以其需要链接
也就是说,如果我们可以告诉编译器,这个函数只会在这个脚本中使用,那么这个函数也就没有了链接的必要性
继续修改,生成项目
1 2 3 4 5 6 7 8 9 10 11 12 13 #include <iostream> void Log (const char * message) static int Multiply (int a, int b) Log ("Multiply" ); return a * b; } int main () std::cin.get (); }
此时没有链接错误
C++变量 C++中不同变量的唯一区别,在于它所需要的内存空间
数据类型的实际大小取决于编译器
以int举例,int通常需要4字节的空间,也就是32比特可以存储数据
变量的名称表示我们希望编译器应该分配给这个变量多少空间,如何理解和处理内存中存储的0和1,如果变量是int,编译器就会这样理解,有符号整形的其中一位存储正负号,剩下的31位存储二进制数字
C++函数 我们不想写重复的代码,所以出现了函数
你可以将数学中函数的概念推移到编程中,函数可以输入参数,同时根据参数返回某些值
然而在编程中,很多东西都不是必须的,函数不一定要有参数,也不一定要返回值
此时你可以理解这个函数就是一组可复用的代码
main函数可以没有返回值,此时main函数会默认返回0
C语言main函数返回值详解-CSDN博客
C++头文件 我们需要一个公共的地方放置声明,不然就要复制粘贴所有函数的声明,这个公共的地方就是头文件
在头文件中,VS为我们插入了#pragma once,它的作用是使这个头文件只会被包含一次
如果没有#pragma once,我们有可能会在头文件包含链中多次包含同一个头文件,造成结构体或其他东西的重定义
注意不要让包含链首位链接
#include 后面的符号,尖括号只用于编译器包含路径,引号可以用于一切,但通常用在相对路径
你可以用文件名后面是否有.h区分C标准库和C++标准库
如何在Visual Studio中调试 当出现了错误,99%的情况都是你的问题,而不是计算机
你可以在程序中打断点,程序在调试模式下会在这个地方暂停,你可以在此处逐行执行并暂停程序
我们还可以在调试模式下观察内存,你可以在自动窗口中观察变量的变化,也可以在debug/windows/memory中查看具体的内存情况
C++条件与分支 关于语法的部分我就不再赘述,这里说一些细节的部分
bool的本质是1字节的二进制数字,如果数字是0,则是false,如果不是,就是true
而if语句的本质是在检查这1字节是否为0
这个特性允许我们检查指针是否为空,因为指针为空时内存表示为0
C++循环 C++控制流语句 没什么好说的
C++指针 我们现在讨论point
我们要知道的是,所有的程序运行时,都需要加载进内存
想象图灵机,计算机内存就像一个长街,街上的每个房子都有一个地址
类型只是我们为了让生活更容易而创造的某种虚构,忘了类型吧,指针是一个整数,代表一个内存地址
我举个例子
1 2 int var = 8 ;int * ptr = &var;
1 2 int var = 8 ;void * ptr = &var;
1 2 int var = 8 ;double * ptr = (double *) & var;
都可以正确的取用var的地址
虽然但是,指针也是类型,指针变量也是变量,是变量就有地址,所以应该有指针的指针
而指针的指针也是类型…
我们可以用”*指针”来解引用,读写指针代表的地址
C++引用 根本上,引用是指针的伪装,是指针的语法糖
引用本身不是新的变量,没有内存空间,引用是已有变量的”引用”
1 2 3 4 5 6 7 8 9 10 11 12 13 14 #include <iostream> #define LOG(x) std::cout<< x << std::endl; int main () int a = 5 ; int & ref = a; ref = 8 ; LOG (a); std::cin.get (); }
从某种角度来说,ref就是a
1 2 3 4 5 6 7 8 9 10 11 12 13 14 15 16 17 18 19 20 21 #include <iostream> #define LOG(x) std::cout<< x << std::endl; void Increment (int & value) value++; } int main () int a = 5 ; int & ref = a; ref = 8 ; Increment (ref); Increment (a); LOG (a); std::cin.get (); }
我们为函数传递的是变量的地址,然后在函数内在更改这个地址的数据
C++类 要讲清面向对象要说的东西实在是太多了,可以看我以前写的东西
我眼中的接口 | 紫地丁的个人博客 (purpleditine.top)
总的来说,因为编程语言需要面向对象思想的好处,所以编程语言需要类
需要强调的是,面向对象只是一个思想,类只能简化你的代码,如果有一件不用类搞不定的事情,用类也一定搞不定
C++类与结构体的对比 C++中,类与结构体只有很小的区别,就是类和类成员可以修饰可见性
结构体在C++中依然存在的原因是C++需要兼容C
所以,如果没什么区别,那我该在什么时候用结构,什么时候用类呢?是不是我想要类的所有成员都是公共的,但又不想写public的时候就该用结构体呢?
还真是,就是这么点事
不过你也可以形成自己的习惯,如果你只需要一个数据集合,用结构体,如果这个数据集合需要隐藏数据,公开并封装操作,显然这个东西已经符合了对象的概念,用类
如何写一个C++类 我们现在写一个Log类,这是一个日志系统,在开发中起到重要的辅助作用
1 2 3 4 5 6 7 8 9 10 11 12 13 14 15 16 17 18 19 20 21 22 23 24 25 26 27 28 29 30 31 32 33 34 class Log { public : const int LogLevelError = 0 ; const int LogLevelWarning = 1 ; const int LogLevelInfo = 2 ; private : int m_LogLevel = LogLevelInfo; public : void SetLevel (int level) { m_LogLevel = level; } void Error (const char * message) { if (m_LogLevel >= LogLevelError) std::cout << "[Error]" << message << std::endl; } void Warn (const char * message) { if (m_LogLevel >= LogLevelWarning) std::cout << "[WARNING]" << message << std::endl; } void Info (const char * message) { if (m_LogLevel >= LogLevelInfo) std::cout << "[Info]" << message << std::endl; } };
这不是啥好代码,但很有逻辑,如果你想知道C++里怎么写类,请
C++中的静态 在类和结构体外使用的static 此时,static意味着链接只在内部,static修饰的东西只在你定义它的翻译单元内可见
1 2 static int s_Variable = 8 ;
1 2 3 4 5 6 7 8 9 10 11 #include <iostream> int s_Variable = 10 ;int main () std::cout << s_Variable << std::endl; std::cin.get (); return 0 ; }
如果我们将Static.cpp修改为
将得到链接错误
我们可以在main.cpp内使用extern关键字
1 2 3 4 5 6 7 8 9 10 #include <iostream> extern int s_Variable;int main () std::cout << s_Variable << std::endl; std::cin.get (); return 0 ; }
这表示,s_Variable将会在外部翻译单元中链接
如果我们将Static.cpp修改回去
1 2 static int s_Variable = 8 ;
又会出现链接错误
在类和结构体内使用的static 此时static代表其修饰的东西在该内存中只有一个实例,所有的对象共享这个成员
C++中的局部静态 你可以在局部作用域中使用static,这关系到变量的生命周期
static修饰的变量会在作用域结束后依然存在
1 2 3 4 5 6 7 8 9 10 11 12 13 14 15 16 #include <iostream> void Function () static int i = 0 ; i++; std::cout << i << std::endl; } int main () Function (); Function (); Function (); std::cin.get (); }
C++枚举 从某种角度来说,枚举就是你给数字加了名字
比如你需要一个东西有三种状态,用0,1,2去表示,完全可以,但它通常是一个int类型,你还可以赋值3,4…此时这个变量就没有意义了
我们需要让这种状态单独成为一个类型,在语法上强制用户只能使用”0,1,2”,此时我们就可以用枚举
1 2 3 4 5 6 7 8 9 10 11 12 13 14 15 16 17 #include <iostream> enum Example { A,B,C }; int main () Example value = B; if (value == B) { std::cout << "hello" << std::endl; } std::cin.get (); }
你也可以给枚举赋值整数类型
1 2 3 4 5 6 7 8 9 10 11 12 13 14 15 16 17 18 19 20 21 #include <iostream> enum Example { A = 0 ,B = 1 ,C = 2 }; int main () Example value = B; if (value == 1 ) { std::cout << "hello" << std::endl; } if (value > B) { std::cout << "hello" << std::endl; } std::cin.get (); }
枚举的值默认从零递增
C++构造函数 1 2 3 4 5 6 7 8 9 10 11 12 13 14 15 16 17 18 19 #include <iostream> class Entity { private: float X, Y; public: void Print() { std::cout << X << "," << Y << std::endl; } }; int main() { Entity a; a.Print(); std::cin.get(); }
1 -1.07374e+08,-1.07374e+08
这是因为x和y没有被幅值,我们可以用一个初始化函数做到这件事
1 2 3 4 5 void Init () x = 0 ; y = 0 }
但我们有更好的办法,构造函数
构造函数在对象被创建的时候运行
1 2 3 4 5 6 7 8 9 10 11 12 13 14 15 16 17 18 19 20 21 22 23 24 25 26 27 28 29 30 31 32 33 #include <iostream> class Entity { private : float X, Y; public : void Print () { std::cout << X << "," << Y << std::endl; } Entity () { X = 0 ; Y = 0 ; } Entity (float x,float y) { X = x; Y = y; } }; int main () Entity a = Entity (0 ,0 ); Entity b; a.Print (); b.Print (); std::cin.get (); }
构造函数在对象创建的时候运行,如果你只使用这个类的静态方法,那么你就不需要使用构造函数
C++会提供默认构造函数,你可以用类名() = delete;将构造函数去掉
C++析构函数 析构函数在对象销毁时运行,堆对象在你使用delete的时候运行析构函数,栈对象在其生命周期结束时运行析构函数
1 2 3 4 5 6 7 8 9 10 11 12 13 14 15 16 17 18 19 20 21 22 23 24 25 26 27 28 29 30 31 32 33 34 35 36 37 38 39 40 41 42 #include <iostream> class Entity { private : float X, Y; public : void Print () { std::cout << X << "," << Y << std::endl; } Entity () { X = 0 ; Y = 0 ; } Entity (float x,float y) { X = x; Y = y; } ~Entity () { std::cout << "Destroyed Entity" << std::endl; } }; void Function () Entity a; } int main () Function (); Entity* a = new Entity (0 ,0 ); delete a; std::cin.get (); }
1 2 Destroyed Entity Destroyed Entity
C++继承 我们可以将公共的功能放在父类中,这样就不用书写重复的代码了,这是继承最直观的作用
当然继承的作用远不止于此
同样,一个编程语言需要面向对象的好处,所以这个编程语言需要继承
1 2 3 4 5 6 7 8 9 10 11 12 13 14 15 16 17 class Entity { public : float X, Y; public : void Move (float xa,float ya) { X += xa; Y += ya; } }; class Player : public Entity{ public : const char * name; };
此时你可以认为Player有两个类型,一个是Player,一个是Entity
C++虚函数 1 2 3 4 5 6 7 8 9 10 11 12 13 14 15 16 17 18 19 20 21 22 23 24 25 26 27 28 29 30 31 32 33 34 35 #include <iostream> class Entity { public : std::string GetName () { return "Entity" ; } }; class Player : public Entity{ private : std::string m_Name; public : Player (const std::string name) :m_Name (name){} std::string GetName () { return m_Name; } }; int main () Entity* e = new Entity (); std::cout << e->GetName () << std::endl; Player* p = new Player ("Pditine" ); std::cout << p->GetName () << std::endl; Entity* entity = p; std::cout << entity->GetName () << std::endl; }
方法在类的内部起作用,当你要调用方法的时候,调用的是属于这个类型的方法
如果我们想要在第三次输出的时候令编译器认为应该调用Player里的方法,此时我们需要虚函数
虚函数通过V表实现编译,包含基类中所有虚函数的映射
我们用virtual关键字将父类中的方法标记为虚函数,也可以选择在子类方法中写override,这更规范,也可以避免一些语法错误
1 2 3 4 5 6 7 8 9 10 11 12 13 14 15 16 17 18 19 20 21 22 23 24 25 26 27 28 29 30 31 32 33 34 35 #include <iostream> class Entity { public : virtual std::string GetName () { return "Entity" ; } }; class Player : public Entity{ private : std::string m_Name; public : Player (const std::string name) :m_Name (name){} std::string GetName () override { return m_Name; } }; int main () Entity* e = new Entity (); std::cout << e->GetName () << std::endl; Player* p = new Player ("Pditine" ); std::cout << p->GetName () << std::endl; Entity* entity = p; std::cout << entity->GetName () << std::endl; }
C++纯虚函数 C++纯虚函数和其他语言的抽象方法和接口差不多
我眼中的接口 | 紫地丁的个人博客 (purpleditine.top)
1 2 3 4 5 6 7 8 9 10 11 12 13 14 15 16 17 18 19 20 21 22 23 24 25 26 27 28 29 30 #include <iostream> class Entity { public : virtual std::string GetName () 0 ; }; class Player : public Entity{ private : std::string m_Name; public : Player (const std::string name) :m_Name (name){} std::string GetName () override { return m_Name; } }; int main () Player* p = new Player ("Pditine" ); std::cout << p->GetName () << std::endl; Entity* entity = p; std::cout << entity->GetName () << std::endl; }
C++可见性 关于用法就不说了
需要强调的是,可见性不是你的电脑需要理解的东西,是开发者需要理解的东西
将所有private改为public不会影响代码的功能,但绝对是个糟糕的想法
这不是功能的问题,但这关乎规范 ,这一个原因就足够你经常用private了
C++数组 C++数组基本上是变量的几何,通常是相同类型的变量
数组的名字是一个指针类型
你需要注意数字名后面的索引
1 2 3 4 5 6 7 8 9 10 #include <iostream> int main () int example[5 ]; example[-1 ] = 12 ; example[5 ] = 31 ; }
在这个例子中,我们修改了不属于这个数组的内存,debug模式下ide会给你报错,但release模式下不会,你可能在不知不觉中犯了很大的错误
1 2 example[2 ] = 5 ; *(int *)((char *)example +8 ) = 5 ;
上面这两行的作用是一样的
1 int count = sizeof (example) / sizeof (int );
用上面的代码获取数组的长度
1 2 3 4 5 #include <array> int main () std::array<int , 5> example; }
你也可以用array代替数组,会有额外的内存开销,但更安全
C++字符串 字符串就是字符数组
1 2 3 4 5 6 7 8 9 10 #include <iostream> int main () const char * name = "Pditine" ; std::cout << name << std::endl; char name2[7 ] = {'P' ,'d' ,'i' ,'t' ,'i' ,'n' ,'e' }; std::cout << name2 << std::endl; }
1 2 Pditine Pditine烫烫烫烫烫烫烫烫烫烫烫烫烫烫泰,憲?
这样写,后者会出现错误,这是因为字符数组內没有终止符
1 2 3 4 5 6 7 8 9 10 #include <iostream> int main () const char * name = "Pditine" ; std::cout << name << std::endl; char name2[8 ] = {'P' ,'d' ,'i' ,'t' ,'i' ,'n' ,'e' ,'\0' }; std::cout << name2 << std::endl; }
不过,这些是C风格的字符串,在C++中,建议使用std::string,它基本上就是字符数组,一些其他数据和一些函数,
1 2 3 4 5 6 7 8 #include <iostream> #include <string> int main () std::string name = "Pditine" ; std::cout<<name << std::endl; std::cin.get (); }
你无法书写以下的代码,因为你不能用std::string类型相加const char*类型
1 std::string name = "Pditine" + "Hello" ;
但你可以这么写,因为”+=”在std::string中被重载了
1 2 3 4 5 6 7 8 9 #include <iostream> #include <string> int main () std::string name = "Pditine" ; name+="Hello" ; std::cout<<name << std::endl; std::cin.get (); }
当std::string作为函数参数,尽量使用const std::string&,因为传递string实际上很慢
C++字符串字面量 你可以在字符串中间加终止符,这会让字符串提前结束
1 2 3 4 5 6 7 8 #include <iostream> #include <string> int main () std::string name = "Pdit\0ine" ; std::cout<<name << std::endl; std::cin.get (); }
有许多不同的字符类型
1 2 3 4 5 6 7 8 9 10 #include <iostream> int main () const char * name = u8"Pditine" ; const wchar_t * name2 = L"Pditine" ; const char16_t * name3 = u"Pditine" ; const char32_t * name4 = U"Pditine" ; std::cin.get ();
C++中的Const const在改变生成代码方面什么也做不了,有点像可见性,它是一种规范,是你做的承诺,让我们的代码更有可读性
被const修饰的变量是一个常量,初始化之后你无法修改它
MAX_AGE在语法上是无法修改的
对于指针来说,以下两种写法代表无法改变指针代表地址的内容
1 2 const int * a = new int ;int const * b = new int ;
以下写法代表无法改变指针变量的值
总之,关键在于constr在*左边还是右边
对于方法,const代表这个方法不会修改类成员
1 2 3 4 5 6 7 8 9 10 class Entity { private : int m_X, m_Y; public : int GetX () const { return m_X; } };
我们无法在方法里修改 m_X和m_Y的值
所以,如果需要,你可以写这样的shit
1 2 3 4 5 6 7 8 9 10 class Entity { private : int *m_X, *m_Y; public : const int * const GetX () const { return m_X; } };
这个方法返回的指针不能被修改,指针代表地址的内容不能被修改,方法里不能修改类成员
当函数或者方法参数是对象,你不会希望复制整个对象来传递数据的,更好的办法是用引用传递,这时,我们就可以决定是否要加一个承诺,承诺这个函数不会修改传入的引用
1 2 3 4 void PrintEntity (const Entity& e) std::cout << e.GetX ()<<std::endl; }
现在我们做这样的事情
1 2 3 4 5 6 7 8 9 10 11 12 13 14 15 16 17 18 19 20 21 22 23 24 25 26 27 28 29 #include <iostream> class Entity { private : int m_X, m_Y; public : int GetX () const { return 1 ; } int GetX () { return 2 ; } }; void PrintEntity (const Entity& e) std::cout << e.GetX ()<<std::endl; } int main () Entity e = Entity (); PrintEntity (e); std::cin.get (); }
我们写两个版本的GetX,你发现PrintEntity调用的是有const的GetX
或者,如果我们有一个Entity常量,这个对象也只能调用const方法
有时候,我们就是想破坏承诺,或许是为了调试,或者别的原因
你可以用mutable关键字实现
1 2 3 4 5 6 7 8 9 10 11 12 class Entity { private : int m_X, m_Y; mutable int var; public : int GetX () const { var = 1 ; return 1 ; } };
mutable使得这个成员变量在const方法内是可以改变的
C++的mutable关键字 1 2 3 4 5 6 7 8 9 10 11 12 class Entity { private : std::string m_Name; mutable int m_DebugCount = 0 ; public : const std::string& GetName () const { m_DebugCount++; return m_Name; } };
除了这个,还有一个用mutable的地方,lambda表达式
1 2 3 4 5 6 7 8 9 10 11 12 13 int main () int x = 8 ; auto f = [=]() mutable { x++; std::cout << x << std::endl; }; f (); std::cout << x << std::endl; std::cin.get (); }
C++的成员初始化列表 成员初始化列表是我们在构造函数为成员变量初始化的方式
确保初始化列表里变量的顺序和类里变量定义的顺序是一致的
1 2 3 4 5 6 7 8 9 10 11 12 13 14 15 16 17 18 19 20 21 class Entity { private : std::string m_Name; int m_Score; public : Entity ():m_Name ("Unknwn" ),m_Score (0 ) { } Entity (const std::string& name,int score):m_Name (name),m_Score (score) { } const std::string& GetName () const { return m_Name; } };
这就是初始化列表,问题在于,我们为什么使用初始化列表
一些是风格的问题,大部分是功能的问题
对于类内部的对象,你在不使用初始化列表,而使用方法参数构造时,你实际上创建了两个对象,然后丢弃了一个,比如以上代码中的m_Name,在不使用初始化列表的情况下,使用构造函数,会创建一个空的string,和一个幅值了的string,然后将这个空的string赋值为后者
C++中的三元操作符 三元操作符实际上是if else的语法糖
1 2 3 4 5 6 7 8 9 10 11 12 13 14 15 #include <iostream> static int s_Level = 1 ;static int s_Speed = 2 ;int main () if (s_Level > 5 ) s_Speed = 10 ; else s_Speed = 5 ; s_Speed = s_Level > 5 ? 10 : 5 ; std::cin.get (); }
8~11行的代码和13行的代码的功能是一样的,后者就是三元运算符
我们可以在三元运算符里嵌套三元运算符
1 2 3 4 5 6 7 8 9 10 11 12 #include <iostream> static int s_Level = 15 ;static int s_Speed = 2 ;int main () s_Speed = s_Level > 5 ? s_Level>10 ? 15 : 10 : 5 ; std::cout << s_Speed << std::endl; std::cin.get (); }
创建并初始化C++对象 你可以选择在栈或堆上创建对象,这表明你需要知道对象在栈和堆上的区别
在栈上创建时,你需要注意对象的生命周期是否是你想要的那样,同时如果对象过大,也不应创建在栈上
在堆上创建时,你需要使用new关键字,你需要内存管理,也就是适时手动销毁对象,但堆上有庞大的空间可以存储对象
C++中的new关键字 都2023年了,有那么多其他好用的语言,你只可能特别需要性能或者要掌控一切,才需要C++,在这个过程中,new是重要的关键字
当你使用new,你希望在堆中找到一块恰当的内存,并得到这个内存的地址
当使用new了,就一定要记得delete
你也可以用new指定内存地址
1 2 3 4 5 6 7 8 9 10 11 12 13 #include <iostream> static int s_Level = 15 ;static int s_Speed = 2 ;int main () int * a = new int (1 ); int * b = new (a) int (2 ); std::cout << *a << "," << *b << std::endl; }
C++隐式装换与explicit关键字 一般来说,我们是这样写代码的
1 2 3 4 5 6 7 8 9 10 11 12 13 14 #include <iostream> class Entity { private : std::string m_Name; int m_Age; public : Entity (const std::string& name): m_Name (name),m_Age (-1 ){} Entity (int age):m_Name ("Unknown" ),m_Age (age ){} };
1 2 3 4 5 6 7 8 int main () Entity a ("Pditine" ) ; Entity b (22 ) ; std::cin.get (); }
但你也可以这样书写
1 2 3 4 5 6 7 8 int main () Entity a ="Pditine" ; Entity b = 22 ; std::cin.get (); }
你甚至可以这样
1 2 3 4 5 6 7 8 9 10 11 int main () PrintEntity (22 ); PrintEntity ((std::string)"Pditine" ); Entity a ="Pditine" ; Entity b = 22 ; std::cin.get (); }
你会注意到以上代码第四行有强制类型转换,这是因为”Pditine”的类型是char[],而C++在这种情况下只允许一次隐式类型转换,而不能是char[]转换成string,再转换成Entity
这也能说明,我们在将”…”幅值给string的时候已经使用了隐式类型转换
将explicit关键字放在构造函数前,意味着这个构造函数不能被用于隐式转换
1 2 3 4 5 6 7 8 9 10 11 12 13 14 15 16 17 18 19 20 21 22 #include <iostream> class Entity { private : std::string m_Name; int m_Age; public : explicit Entity (const std::string& name) : m_Name(name),m_Age(-1 ){ } explicit Entity (int age) :m_Name("Unknown" ),m_Age(age ){ }; int main () Entity a =(Entity)"Pditine" ; Entity b = (Entity)22 ; std::cin.get (); }
C++运算符及其重载 首先,你可能已经知道运算符是什么了,比如+,=,或者<,>,.,&
但你或许不知道,运算符就是函数,所以运算符也应该可以重载
1 2 3 4 5 6 7 8 9 10 11 12 13 14 15 16 17 18 19 20 21 22 23 24 25 26 27 28 #include <iostream> struct Vector2 { float x, y; Vector2 (float x, float y) :x (x),y (y){} Vector2 Add (const Vector2& other) const { return {x + other.x, y + other.y}; } Vector2 Multiply (const Vector2& other) const { return {x * other.x, y * other.y}; } }; int main () Vector2 position (4.0f , 4.0f ) ; Vector2 speed (0.5f , 1.5f ) ; Vector2 powerup (1.1f , 1.1f ) ; Vector2 result = position.Add (speed.Multiply (powerup)); std::cin.get ();
我们想要实现这样的功能,但现在代码看上去有点难读,没关系,我们可以重载运算符
1 2 3 4 5 6 7 8 9 10 11 12 13 14 15 16 17 18 19 20 21 22 23 24 25 26 27 28 29 30 31 32 33 34 35 36 37 38 39 #include <iostream> struct Vector2 { float x, y; Vector2 (float x, float y) :x (x),y (y){} Vector2 Add (const Vector2& other) const { return {x + other.x, y + other.y}; } Vector2 operator +(const Vector2& other) const { return Add (other); } Vector2 Multiply (const Vector2& other) const { return {x * other.x, y * other.y}; } Vector2 operator *(const Vector2& other)const { return Multiply (other); } }; int main () Vector2 position (4.0f , 4.0f ) ; Vector2 speed (0.5f , 1.5f ) ; Vector2 powerup (1.1f , 1.1f ) ; Vector2 result = position + speed * powerup; std::cin.get (); }
你也可以这么写代码
1 2 3 4 5 6 7 8 9 Vector2 Add (const Vector2& other) const return *this + other; } Vector2 operator +(const Vector2& other) const { return { x + other.x, y + other.y }; }
或者这么写
1 2 3 4 5 6 7 8 9 Vector2 Add (const Vector2& other) const return operator +(other); } Vector2 operator +(const Vector2& other) const { return { x + other.x, y + other.y }; }
C++有这样的语法,但在这这么写实在是太抽象了
你也重载其他运算符,比如左移
1 2 3 4 5 6 7 8 9 10 11 12 13 14 15 16 17 std::ostream& operator <<(std::ostream& stream,const Vector2& other) { stream << other.x << "," << other.y; return stream; } int main () Vector2 position (4.0f , 4.0f ) ; Vector2 speed (0.5f , 1.5f ) ; Vector2 powerup (1.1f , 1.1f ) ; Vector2 result = position + speed * powerup; std::cout << result; std::cin.get (); }
C++的this关键字 this是当前对象的指针,用于找到当前对象的实例
如果你在常量方法中访问this,它会是常量指针常量,在普通方法中,它会是指针
C++对象的生存期 1 2 3 4 5 6 7 8 9 10 11 12 13 14 15 16 17 18 19 20 21 22 #include <iostream> class Entity { public : Entity () { std::cout << "Create Entity!" << std::endl; } ~Entity () { std::cout << "Destroyed Entity!" << std::endl; } }; int main () { Entity e; } }
1 2 Create Entity! Destroyed Entity!
1 2 3 4 5 6 int main () { Entity* e = new Entity (); } }
以上是这次的重点,你需要分辨堆栈,理解栈上对象的生命周期
当栈上的对象离开栈作用域,对象会自动销毁
现在,我还是希望在堆上创建对象,但我希望当对象超出作用域时销毁,我们这样编写一个类
1 2 3 4 5 6 7 8 9 10 11 12 13 14 15 16 17 18 19 20 21 22 23 24 25 26 27 28 29 30 31 32 33 34 35 36 #include <iostream> class Entity { public : Entity () { std::cout << "Create Entity!" << std::endl; } ~Entity () { std::cout << "Destroyed Entity!" << std::endl; } }; class ScopedPtr { private : Entity* m_Ptr; public : ScopedPtr (Entity* ptr):m_Ptr (ptr){} ~ScopedPtr () { delete m_Ptr; } }; int main () { ScopedPtr e = new Entity (); } }
1 2 Create Entity! Destroyed Entity!
C++智能指针 智能指针意味着,当你new了,你确不一定要delete,内存会在某个时候自动释放,比如unique指针
1 2 3 4 5 6 7 8 9 10 11 12 13 14 15 16 17 18 19 20 21 22 23 24 25 26 27 28 #include <iostream> #include <memory> class Entity { public : Entity () { std::cout << "Created Entity!" << std::endl; } ~Entity () { std::cout << "Destroyed Entity!" << std::endl; } void Print () { std::cout << "hello" << std::endl; } }; int main () { std::unique_ptr<Entity> entity = std::make_unique <Entity>(); entity->Print (); } }
1 2 3 Created Entity! hello Destroyed Entity!
你无法复制unique指针,它的拷贝构造函数和拷贝构造操作符被删除了,如果你想这个做,可以用share指针
share指针的工作方式是引用计数,跟踪你的指针有多少个引用,当引用数为0,对象被销毁
1 2 3 4 5 6 7 8 9 int main () { std::shared_ptr<Entity> sharedEntity = std::make_shared <Entity>(); { std::shared_ptr<Entity> e0 = sharedEntity; } } }
1 2 Created Entity! Destroyed Entity!
你也可以结合weak指针,它可以幅值为share指针,但不会增加引用计数
1 2 3 4 5 6 7 8 9 10 11 int main () { std::weak_ptr<Entity> e; std::shared_ptr<Entity> sharedEntity = std::make_shared <Entity>(); { std::shared_ptr<Entity> e0 = sharedEntity; e = sharedEntity; } } }
C++的复制和拷贝构造函数 我们写一个String类
1 2 3 4 5 6 7 8 9 10 11 12 13 14 15 16 17 18 19 20 21 22 23 24 25 26 27 28 #include <iostream> class String { private : char * m_Buffer; unsigned int m_Size; public : String (const char * string) { m_Size = strlen (string); m_Buffer = new char [m_Size + 1 ]; memcpy (m_Buffer, string, m_Size + 1 ); m_Buffer[m_Size] = 0 ; } ~String () { delete [] m_Buffer; } friend std::ostream& operator <<(std::ostream& stream, const String& string); }; std::ostream& operator <<(std::ostream& stream,const String& string) { stream << string.m_Buffer; return stream; }
现在我们做这样的操作
1 2 3 4 5 6 7 int main () String string = "Pditine" ; String second = string; std::cout << string << std::endl; std::cout << second << std::endl; }
如果你打断点一步步执行,你会发现,两个”Pditine”可以正常输出,但程序最后会报错
这是因为我们进行的是浅拷贝,这两个String的m_Buffer是相同的,当作用域到尽头,m_Buffer的空间会被释放两次
现在,我们为String写一个拷贝构造函数
1 2 3 4 5 6 7 8 9 10 11 12 13 14 15 16 17 18 19 20 21 22 23 24 25 26 27 28 29 30 31 32 33 34 35 36 37 38 39 40 41 42 #include <iostream> class String { private : char * m_Buffer; unsigned int m_Size; public : String (const char * string) { m_Size = strlen (string); m_Buffer = new char [m_Size + 1 ]; memcpy (m_Buffer, string, m_Size + 1 ); m_Buffer[m_Size] = 0 ; } String (const String& other): m_Size (other.m_Size) { m_Buffer = new char [m_Size + 1 ]; memcpy (m_Buffer, other.m_Buffer, m_Size + 1 ); } ~String () { delete [] m_Buffer; } friend std::ostream& operator <<(std::ostream& stream, const String& string); }; std::ostream& operator <<(std::ostream& stream,const String& string) { stream << string.m_Buffer; return stream; } int main () String string = "Pditine" ; String second = string; std::cout << string << std::endl; std::cout << second << std::endl; }
C++的箭头操作符 当我们在使用指针,我们不想先逆向引用再调用对象内的东西,箭头操作符允许我们直接调用指针所代表的对象的成员
你可以重载箭头操作符来简化代码
你也可以写下这样的东西
1 2 3 4 5 6 7 8 9 10 11 12 13 14 struct Vector3 { float x, y, z; }; int main () int offset = (int )&((Vector3*)nullptr )->x; std::cout << offset << std::endl; offset = (int )&((Vector3*)nullptr )->y; std::cout << offset << std::endl; offset = (int )&((Vector3*)nullptr )->z; std::cout << offset << std::endl; }
这可以用来获取内存中某个值的偏移量
C++的动态数组 Vector是C++模板库中的内容,虽然叫”向量”,实际上这是一个动态数组
Vector在内存中不是碎片,而是一条直线
1 2 3 4 5 6 7 8 9 10 11 12 13 14 15 16 17 18 19 20 21 22 #include <iostream> #include <vector> struct Vertex { float x, y, z; }; int main () std::vector<Vertex> vertices; vertices.push_back ({ 1 ,2 ,3 }); vertices.push_back ({ 4 ,5 ,6 }); for (int i = 0 ; i < vertices.size (); i++) std::cout << vertices[i].z; for (const Vertex& v : vertices) std::cout << v.x; vertices.erase (vertices.begin () + 1 ); }
C++的stdvector使用优化 现在我们给Vertex写一个拷贝构造,观察Vertex何时被复制了
1 2 3 4 5 6 7 8 9 10 11 12 13 14 15 16 17 18 19 20 21 22 23 24 25 #include <iostream> #include <vector> struct Vertex { float x, y, z; Vertex (float x, float y, float z):x (x),y (y),z (z) { } Vertex (const Vertex& vertex):x (vertex.x),y (vertex.y),z (vertex.z) { std::cout << "Copied!" << std::endl; } }; int main () std::vector<Vertex> vertices; vertices.push_back ({ 1 ,2 ,3 }); vertices.push_back ({ 4 ,5 ,6 }); vertices.push_back ({ 7 ,8 ,9 }); }
1 2 3 4 5 6 Copied! Copied! Copied! Copied! Copied! Copied!
我们总共就加了三个元素,但这些元素进行了6次拷贝
首先,我们在栈上创建了Vertex(1,2,3),然后将它复制到vector的内存中,发生一次拷贝,此时vector的容量为1
然后,我们加入vertex(4,5,6),vector重新分配了一个有2容量的内存,并将两个元素复制到其中,发生两次拷贝
最后同理,加入vertex(7,8,9),vector重新分配了一个有3容量的内存,并将3个元素复制到其中,发生三次拷贝
这就是6次拷贝的来源,我们可以使vector的容量为3,或另一个个合适的数,这样就可以避免拷贝
1 2 3 4 5 6 7 8 int main () std::vector<Vertex> vertices; vertices.reserve (3 ); vertices.push_back ({ 1 ,2 ,3 }); vertices.push_back ({ 4 ,5 ,6 }); vertices.push_back ({ 7 ,8 ,9 }); }
成功了,但我们还可以做的更好,程序依然需要拷贝,这是因为我们始终在main函数的栈上创建元素,然后将元素复制到vector的内存中,我们可以使用emplace_back
这表示我们不是传递已经构造好的元素,而是传递构造函数的参数列表,然后直接在vector的内存中创建元素
1 2 3 4 5 6 7 8 int main () std::vector<Vertex> vertices; vertices.reserve (3 ); vertices.emplace_back ( 1 ,2 ,3 ); vertices.emplace_back ( 4 ,5 ,6 ); vertices.emplace_back ( 7 ,8 ,9 ); }
什么也没有输出,这正是我们想要的
如何在C++中处理多返回值 显然在默认情况下一个函数不能返回多个返回值
你可以通过返回数组或者vector返回相同类型的多个返回值
如果你想返回不同类型的值,你可以用下面的方法
封装为结构体数据类来传递数据
通过指针或引用更改输入参数
返回Tuple或pair
C++的模板 如果你熟悉其他语言比如C#,你可以知道一个东西叫泛型
C++的模板和这个不是一回事,功能有类似,但不是一回事
模板有些像宏,不像泛型受制于类型系统或者别的因素,模板要强大的多
模板允许你给出一个代码实例,然后让编译器帮你写代码
1 2 3 4 5 6 7 8 9 10 11 12 13 14 #include <iostream> template <typename T>void Print (T value) std::cout << value << std::endl; } int main () Print (1 ); Print ("123" ); Print (true ); }
当我们写下Print的时候,实际上这个函数并没有真的存在,而当我们调用函数的时候,基于我们传入的参数,这个函数会被创建出来
上面的例子是隐式的推断我们输入的类型,我们也可以显示的标记类型
1 2 3 4 5 6 int main () Print <int >(1 ); Print <std::string>("123" ); Print <bool >(true ); }
如果我从来没有调用Print,这个函数就根本不存在;当我们去掉Print的调用,并且制造一些语法错误,有些ide甚至不会给你报错
我们也可以写和模板函数同名的函数,请注意我的函数写法与其输出
1 2 3 4 5 6 7 8 9 10 11 12 13 14 15 16 #include <iostream> template <typename T>void Print (T value) std::cout << value << std::endl; } void Print (int value) std::cout <<"int:" << value << std::endl; } int main () Print (1 ); std::cin.get (); }
1 2 3 4 5 int main () Print <int >(1 ); std::cin.get (); }
模板并不只基于函数,你也可以书写模板类
而且,你也可以将制定类型设为模板
1 2 3 4 5 6 7 8 9 10 11 12 13 14 15 16 17 18 19 #include <iostream> template <typename T ,int N>class Array { private : T m_Array[N]; public : int GetSize () const { return N; } }; int main () Array<int ,5 > array; std::cout << array.GetSize (); std::cin.get (); }
所以你大概能猜出C++的模板是如何工作的了,基本上,尖括号中每一项左边的部分是一种约定,typename意味着这里应该是一个类型名,int或者别的具体类型意味着这里应该是一个具体的元素,当你调用模板类或者模板函数的时候,你根据尖括号的约定来填空,然后C++将你填入的东西放到指定的位置,生成真正的代码
C++堆与栈的比较 当我们的程序开始的时候,内存被分成了许多区域,但我们只关心栈和堆,栈和堆是ram中实际存在的区域
在以下的例子中,上半部分的代码是在栈分配内存,下半部分的代码是在堆分配内存
1 2 3 4 5 6 7 8 9 int main () int value = 5 ; int array[5 ]; int * hvalue = new int ; *hvalue = 5 ; int * harray = new int [5 ]; }
物理上,value和array的位置实际上很接近,因为当你在栈上分配多少字节,栈指针基本上就移动多少字节,当一个栈区域结束,意味着一些变量的生命结束,栈指针再移动回一定的字节
所以栈很快,因为栈将所有的东西都堆在一起,只是移动栈指针然后返回栈指针的地址
但hvalue和harray的物理位置很远,因为它们在堆中分配
你的程序维护一个叫free list的东西,它跟踪那些内存块是空闲的,在哪里等等,当你需要一个堆的内存,程序会浏览freelist,找到一个和我们要求的一样大的空闲的内存,然后返回这个内存的地址
总的来说,在堆中分配内存需要一堆事情,而在栈上分配内存只需要移动栈指针
C++的宏 当编译C++代码时,代码会先过一遍预处理器,这是宏起作用的时候
我们希望做的,是使用宏将代码中的文本替换成其他的东西
1 2 3 4 5 6 7 8 #include <iostream> #define WAIT std::cin.get() int main () WAIT; }
所以这就是宏起作用的方式,但请注意,这不是好的代码 ,不要这么使用宏,如果宏定义在其他文件中,程序员会因为查找宏定义而头疼
我们不用将宏限制为完整的语句,它可以是任何东西,因为宏仅仅是文本替换
1 2 3 4 5 6 7 8 #include <iostream> #define ENDBRACE } int main () std::cin.get (); ENDBRACE
你也可以在宏中加”变量”
1 2 3 4 5 6 7 8 9 #include <iostream> #define LOG(x) std::cout<< x <<std::endl int main () LOG (1 ); std::cin.get (); }
你也可以写多行的宏,不必将一整个代码块都挤在同一行
1 2 3 4 5 6 7 8 #include <iostream> #define MAIN int main()\ {\ std::cin.get();\ }\ MAIN
确保不要在反斜杠后面加空格
现在我们举一个正常的宏使用场景
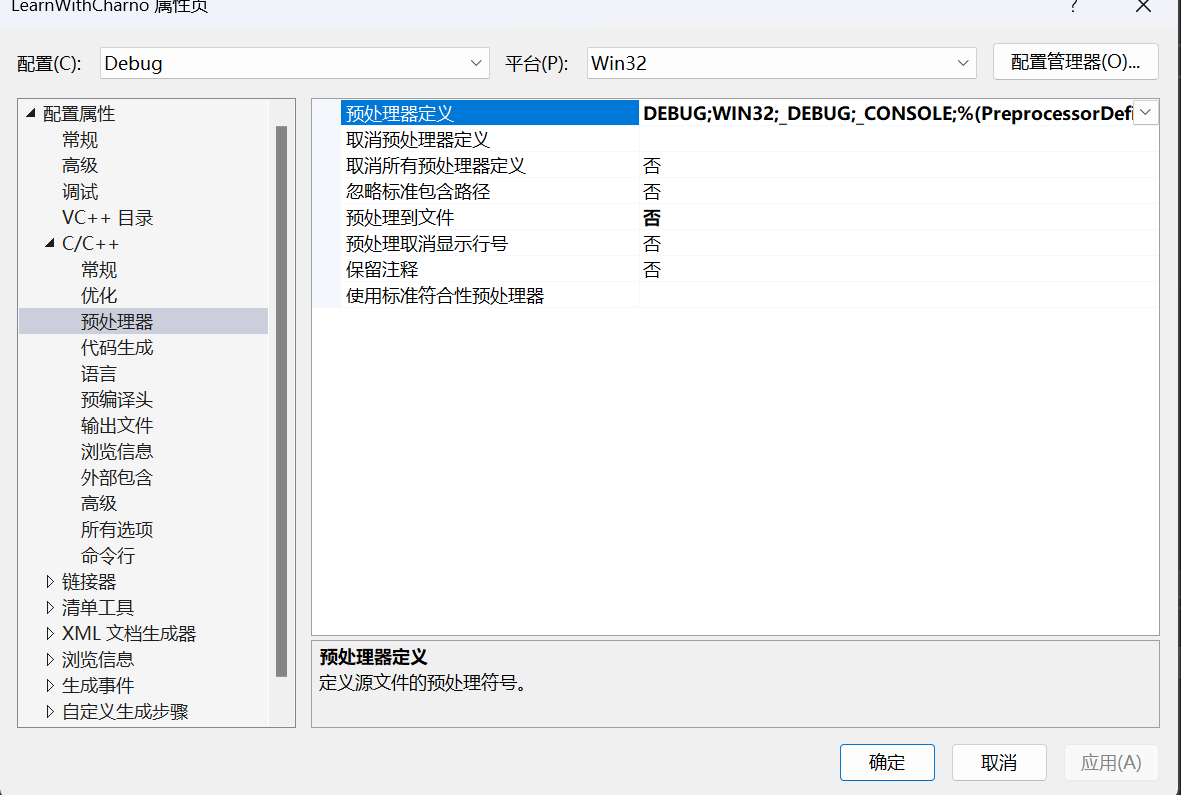
我们使用VS时,或许希望程序在debug模式下输出一些信息,但在release模式下不输出,因为我们不希望程序真正运行的时候还有额外的代码
此时我们可以在日志中使用宏
更改项目属性
1 2 3 4 5 6 7 8 9 10 11 12 13 #include <iostream> #ifdef DEBUG #define LOG(x) std::cout<< x <<std::endl #else #define LOG(x) #endif int main () LOG (1 ); std::cin.get (); }
此时,当我们在debug模式下LOG才会起作用,而release模式下LOG会被直接删除,或者你也可以理解成替换为””
C++中的auto关键字 到目前为止,我们虽然提及过类型是”虚假的”,只是一种标记,但我们也不能丢弃类型,因为类型确实让我们写代码的过程更高效了
但有时,我们获取不在乎某个值的类型,甚至仅仅不想思考它的类型,我们可以使用auto
1 2 3 4 5 6 7 8 #include <iostream> int main () int a = 5 ; auto b = a; std::cin.get (); }
auto的使用很简单,就这样,原理也很简单,编辑器知道a的类型,或者在别的情况下,编辑器知道函数返回的类型,所以编辑器可以自行推断类型
然后让我们讨论一个问题:我们还要写类型吗,是不是可以所有能写auto的地方都写auto呢
如果是上面的例子,或者是auto a = 5,此时不要用auto,因为显示的写出类型可以让代码更清晰
但如果获取的值是一个函数的返回值,
1 2 3 4 5 6 7 8 9 10 11 12 #include <iostream> std::string GetName () return "Pditine" ; } int main () auto name = GetName (); std::cin.get (); }
就使用auto,因为一来,我们无法从代码文本中看出函数的返回值类型,二来,而如果API改变了返回值的类型,比如上面的例子函数的返回值改为char*,使用auto也不会出错
后者也是一种双刃剑,因为你可以无法发现API返回类型的改变而使强类型的功能出错,这里就具体情况具体分析了
总的来说,不使用auto没什么坏处,或者说总是知道你操作的类型没什么坏处
C++静态数组 1 2 3 4 5 6 7 8 9 10 11 #include <iostream> #include <array> int main () std::array<int , 5> data; data[0 ] = 2 ; data[1 ] = 1 ; std::cout << data[0 ]; std::cin.get (); }
array的使用基本上和C风格的数组差不多
array是一个类,相比于C风格的数组,有许多拓展的功能,且内存原理基本上C数组相同,上面的例子中,array的内存存储在栈上(和vector不一样)
使用array有许多好处,比如在debug模式下的边界检查,直接返回的size等等,而且没有什么多于的内存开销,你应该到处使用array
C++函数指针 函数指针是一个将函数赋值给变量的方式,你可以它实现许多神奇的功能
本质上说,函数也是一堆0101,也存储在内存中,所以也有地址,有地址的东西就有指针
1 2 3 4 5 6 7 8 9 10 11 12 13 14 #include <iostream> void HelloWorld (int a) std::cout << "Hello World! Value:" <<a<< std::endl; } int main () void (*function)(int ); function = &HelloWorld; function (5 ); std::cin.get (); }
然后函数指针就不难理解了
C++的lambda lambda是我们创建匿名函数的方式,在所以我们会设置函数指针的地方都可以使用lambda
1 2 3 4 5 6 7 8 9 10 11 12 13 14 #include <iostream> #include <vector> void ForEach (const std::vector<int >& values, void (*func)(int )) for (int value : values) func (value); } int main () std::vector<int > values = { 1 ,4 ,5 ,6 ,2 }; ForEach (values, [](int value) {std::cout << "Value:" << value << std::endl; }); std::cin.get (); }
ForEach的第二个参数是一个函数指针,意味着我们可以在这里写一个lambda
中括号中的内容表示捕获
【59】【Cherno C++】【中字】C++的lambda_哔哩哔哩_bilibili
为什么不使用namespace std 当你加上了using namespace std,你就不需要在很多地方写std::
但大部分情况你依然”需要”写std::,因为这样可以使你分清你使用的是标准库的东西还是别的地方的东西
同样,在多数情况下,你也需要写其他的命名空间名::来避免名称相同导致的错误
你可以仅仅在函数或者别的作用域中使用using nmaespace …,但不要在头文件中使用
C++名称空间 C++用命名空间来避免命名冲突
1 2 3 4 5 6 7 8 9 10 11 12 13 14 15 16 17 18 19 20 21 22 #include <iostream> #include <string> #include <algorithm> namespace apple { void print (const char * text) std::cout << text << std::endl; } } namespace orange{ void print (const char * text) std::string temp = text; std::reverse (temp.begin (), temp.end ()); std::cout << temp << std::endl; } } int main () orange::print ("hello" ); apple::print ("hellp" ); }
你也可以嵌套命名空间
1 2 3 4 5 6 7 8 9 10 namespace apple {namespace function{ void print (const char * text) std::cout << text << std::endl; } }} int main () orange::print ("hello" ); apple::function::print ("hello" ); }
C++线程 我们以前写的代码都是单线程的
当我们进入到真正的工程中,常常需要使用多线程
比如,当我们在等待用户输入的时候,我们以前的代码是直接阻塞住,等待用户的输入
在等待用户输入的时候,我们就可以开一个线程做些其他的事情,比如记录什么
1 2 3 4 5 6 7 8 9 10 11 12 13 14 15 16 17 18 19 20 21 22 23 #include <iostream> #include <thread> static bool s_Finished = false ;void DoWork () using namespace std::literals::chrono_literals; while (!s_Finished) { std::cout << "Working...\n" ; std::this_thread::sleep_for (1 s); } } int main () std::thread worker (DoWork) ; std::cin.get (); s_Finished = true ; worker.join (); std::cin.get (); }
C++计时 如果你希望某些事情在特定实践发生,那么你就需要计时
有几种方法可以实现
C++11后C++库中的chrono
操作系统库API
我们现在使用无关系统的C++库来实现
线程的睡眠实现可能不是你代码中写的精确的时间,计时本身也有时间开销
1 2 3 4 5 6 7 8 9 10 11 12 13 14 15 16 17 #include <iostream> #include <thread> #include <chrono> int main () using namespace std::literals::chrono_literals; auto start = std::chrono::high_resolution_clock::now (); std::this_thread::sleep_for (1 s); auto end = std::chrono::high_resolution_clock::now (); std::chrono::duration<float >duration = end - start; std::cout<<duration.count ()<<std::endl; }
我们现在使用对象生命周期的原理实现一个计时器
1 2 3 4 5 6 7 8 9 10 11 12 13 14 15 16 17 18 19 20 21 22 23 24 25 26 27 28 29 30 31 32 33 34 35 #include <iostream> #include <chrono> struct Timer { std::chrono::time_point<std::chrono::steady_clock> start,end; std::chrono::duration<float > duration; Timer () { start = std::chrono::high_resolution_clock::now (); } ~Timer () { end = std::chrono::high_resolution_clock::now (); duration = end - start; float ms = duration.count ()*1000.0f ; std::cout<<"Timer took" <<ms<<"ms" <<std::endl; } }; void Action () for (int i =0 ;i<5 ;++i) { std::cout<<"Hello" <<std::endl; } } int main () Timer timer; Action (); }
1 2 3 4 5 6 Hello Hello Hello Hello Hello Timer took0.3052ms
我们还可以让它再快一点
1 2 3 4 5 6 7 8 9 10 11 12 13 void Action () for (int i =0 ;i<5 ;++i) { std::cout<<"Hello\n" ; } } int main () Timer timer; Action (); }
1 2 3 4 5 6 Hello Hello Hello Hello Hello Timer took0.0964ms
既然你使用的是C++,你要想写更快的代码,你就要关心你的代码性能
C++多维函数 不要把多维数组看的太复杂,数组是数据的集合,所以2维数组是数组的集合,3维数组是2维数组的集合,以此类推
1 2 3 int * array = new int [50 ];int ** a2d = new int *[50 ];int *** a3d = new int **[50 ];
我们知道int的空间是4个字节,而类型是不重要的,所以这三行代码所做的事情是相同的,也就是分配200个字节
a2d里存储的是一堆地址,这些地址就可以代表数组第一个元素的位置
a3d里存储的还是一堆地址,这些地址可以代表一个二位数组第一个元素的位置
如果这样分配内存
1 2 3 4 5 6 int main () int ** a2d = new int *[5 ]; for (int i= 0 ;i<5 ;++i) a2d[i] = new int [5 ]; }
会造成”内存碎片”问题,你的每个数组在内存中的位置不确定,可能很近也可能很远
当你从多维数组的一个元素跳到另一个元素,会造成cache miss
而我们完全可以用一个连续的内存存储数据
1 2 3 4 int main () int * array = new int [5 *5 ]; }
C++排序 1 2 3 4 5 6 7 8 9 10 11 12 13 #include <iostream> #include <vector> #include <algorithm> int main () std::vector<int > values = {3 ,5 ,1 ,4 ,2 }; std::sort (values.begin (),values.end ()); for (const int value:values) std::cout<<value<<"\n" ; std::cin.get (); }
我们也可以给排序一个谓词,让排序按照我们希望的方式进行
1 2 3 4 5 6 7 8 9 10 11 12 13 14 #include <iostream> #include <vector> #include <algorithm> #include <functional> int main () std::vector<int > values = {3 ,5 ,1 ,4 ,2 }; std::sort (values.begin (),values.end (),std::greater <int >()); for (const int value:values) std::cout<<value<<"\n" ; std::cin.get (); }
或者
1 2 3 4 5 6 7 8 9 10 11 12 int main () std::vector<int > values = {3 ,5 ,1 ,4 ,2 }; std::sort (values.begin (),values.end (),[](int a,int b){ return a<b; }); for (const int value:values) std::cout<<value<<"\n" ; std::cin.get (); }
C++的类型双关 C++是强类型的,C++有一个类型系统
但C++的类型限制不是那么强,至少没有java或者C#强,你可以直接访问内存
如果我们这样写代码,C++会进行隐式转换
1 2 3 4 5 6 7 #include <iostream> int main () int a =10 ; double value = a; std::cin.get (); }
在x86环境下观察到a的内存为0a 00 00 00,value的内存为00 00 00 00 00 00 24 40
这说明隐式转换使数据内存数据在传递时发生了改变
如果我们这样写
1 2 3 4 5 6 7 #include <iostream> int main () int a =10 ; double value = *(double *)&a; std::cin.get (); }
观察到a的内存同上,value的内存为0a 00 00 00 cc cc cc cc,这说明作为double类型,它表示的数字是 -9.2559592117432108e+61
这个例子进一步表明你可以在C++中绕过类型系统,直接控制内存
我们还可以用更骚一点的方式
1 2 3 4 5 6 7 8 9 10 11 12 13 14 15 #include <iostream> struct Entity { int x,y; }; int main () Entity e = {3 ,5 }; int * position = (int *)&e; std::cout<<position[0 ]<<"," <<position[1 ]<<std::endl; std::cin.get (); }
C++的联合体 一个联合体可以有多个成员,但只占一个成员的内存
通常人们用联合体实现的功能和类型双关是紧密相关的
通常union是匿名使用的,但匿名union不能有成员函数
1 2 3 4 5 6 7 8 9 10 11 12 13 14 15 16 17 #include <iostream> int main () struct Union { union { float a; int b; }; }; Union u; u.a = 2.0f ; std::cout<<u.a<<"\n" <<u.b<<std::endl; }
这就像是将一个float赋值为2.0f,然后将这个内存看成是int,这就是类型双关了
1 2 3 4 5 6 7 8 9 10 11 12 13 14 15 16 17 18 19 20 21 22 23 24 25 26 27 28 29 30 31 32 33 34 35 #include <iostream> struct Vector2 { float x,y; }; struct Vector4 { union { struct { float x,y,z,w; }; struct { Vector2 a,b; }; }; }; void PrintVector2 (const Vector2& vector2) std::cout<<vector2.x<<"," <<vector2.y<<"\n" ; } int main () Vector4 vector4 = {1.0f ,2.0f ,3.0f ,4.0f }; PrintVector2 (vector4.a); vector4.z = 100.0f ; PrintVector2 (vector4.b); std::cin.get ();
以上相当于我们可以用两个Vector2来组成Vector4,xyzw和ab所代表的内存是相同的
C++虚析构函数 我们现在做一个实验
1 2 3 4 5 6 7 8 9 10 11 12 13 14 15 16 17 18 19 20 21 22 23 24 25 26 #include <iostream> class Base { public : Base () {std::cout<<"Base Constructor\n" ; } ~Base (){ std::cout<<"Base Destructor\n" ; } }; class Derived :public Base{ public : Derived () { std::cout << "Derived Constructor\n" ; } ~Derived () { std::cout << "Derived Destructor\n" ; } }; int main () Base* base = new Base; delete base; std::cout<<"------------------" <<std::endl; Derived* derived = new Derived; delete derived; std::cin.get (); }
1 2 3 4 5 6 7 Base Constructor Base Destructor ------------------ Base Constructor Derived Constructor Derived Destructor Base Destructor
我们发现当我调用子类的构造和析构,也会按一定的顺序调用父类的构造和析构
但如果我们使用多态指针
1 2 3 4 5 6 7 8 9 10 11 12 int main () Base* base = new Base; delete base; std::cout<<"------------------" <<std::endl; Derived* derived = new Derived; delete derived; std::cout << "------------------" << std::endl; Base* poly = new Derived; delete poly; std::cin.get (); }
1 2 3 4 5 6 7 8 9 10 11 Base Constructor Base Destructor ------------------ Base Constructor Derived Constructor Derived Destructor Base Destructor ------------------ Base Constructor Derived Constructor Base Destructor
我们可以看到父类和子类的构造都正常调用了,但子类的析构没有调用,这会导致内存泄漏,因为父类的析构无法删除子类新成员占有的内存
在使用虚函数时,我们给父类的函数加上virtual,意味着有可能会有子类复写这个函数
但我们给析构加上virtual,意味着当使用多态指针调用析构,我们将会调用子类和父类的析构
1 2 3 4 5 6 7 8 9 10 11 12 13 14 15 16 17 18 19 20 21 22 23 24 25 26 27 28 29 30 31 32 33 34 35 36 37 #include <iostream> class Base { public : Base () {std::cout<<"Base Constructor\n" ; } virtual ~Base (){ std::cout<<"Base Destructor\n" ; } }; class Derived :public Base{ public : int * a; Derived () { a = new int [3 ]; std::cout << "Derived Constructor\n" ; } ~Derived () { delete [] a; std::cout << "Derived Destructor\n" ; } }; int main () Base* base = new Base; delete base; std::cout<<"------------------" <<std::endl; Derived* derived = new Derived; delete derived; std::cout << "------------------" << std::endl; Base* poly = new Derived; delete poly; std::cin.get (); }
1 2 3 4 5 6 7 8 9 10 11 12 Base Constructor Base Destructor ------------------ Base Constructor Derived Constructor Derived Destructor Base Destructor ------------------ Base Constructor Derived Constructor Derived Destructor Base Destructor
C++的类型转换 之前我们已经提及了类型转换
我们可以使用多种方法进行强制类型转换
C风格方法
1 2 3 4 5 6 int main () double value = 4.55 ; int a = (int )value; std::cin.get (); }
C++风格方法
C++方法不会实现任何C方法不能做的功能,你可以理解只是一些语法糖
static_cast reinterpret_cast const_cast dynamic_cast
如果你想要使转换之后的内存适应新的类型,你可以用static_cast
1 2 3 4 5 6 7 int main () double value = 4.55 ; int a = static_cast <int >(value); std::cout<<a; std::cin.get (); }
条件与断点 C++中的安全 C++的安全问题大多数来源于指针和内存
我们先说内存,常见的问题是内存泄漏,比如你使用了堆的空间,但忘了清空,此处就出现了内存泄漏
这可以是无害的,也可能是灾难性的
以及内存所有权问题
如果你有一个原始指针,但你将它作为参数传输了出去,两个指针都有了这个内存的引用,那么内存的所有权属于谁呢